
Learning how to plan a trip itinerary changes a vague idea into a calm, workable trip. However, many people fill every hour and return home more tired than rested. Therefore, this guide shows how to plan a trip step by step without overpacking your days. Indeed, you will build a plan that protects both highlights and downtime.
Firstly, you will lock dates, budget, and pace before you book anything. Secondly, you will group sights by area and choose two anchors for each day. Finally, you will add buffer time, rainy-day backups, and a clear daily template. Consequently, your plan will stay useful even when trains, weather, or moods change.
Why Does a Good Itinerary Feel Spacious, Not Stuffed?
Understandably, a packed schedule looks efficient on paper before you travel. In reality, however, queues, slow meals, and tired feet stretch every activity. Moreover, constant rushing hides the small moments that make a trip memorable. Therefore, a good itinerary leaves white space around the moments that matter most.
Think of your itinerary as a frame rather than a cage for the trip. For example, a frame holds the shape while you move freely inside it. Similarly, a light plan guides your day without controlling every single minute. Ultimately, you want structure that supports spontaneity instead of suffocating it.
Step 1: Lock Your Dates, Budget, and Travel Style First
Firstly, write down your fixed dates before you research any attractions. Specifically, note arrival time, departure time, and any non-negotiable events. Additionally, mark work limits, school holidays, and rest needs after you return. Consequently, you will plan with real days rather than hopeful guesses.
Next, set a rough daily budget that covers stays, food, transport, and entries. Admittedly, exact costs vary widely by destination, season, and travel style. Nevertheless, a rough range stops you from building a plan you cannot afford. For instance, this guide to the cheapest places to visit in the world helps you compare costs honestly.
Meanwhile, choose one travel style word for this particular trip. For example, you might choose slow, festive, outdoorsy, food-focused, or family-friendly. Indeed, that single word settles arguments when two good options compete. Therefore, keep returning to it whenever your wish list grows too long.
Step 2: Decide How Far Ahead You Should Plan
Many first-time planners ask: how far in advance should you plan a trip? Honestly, the answer depends on season, destination demand, and trip complexity. However, you should secure transport and stays before you fine-tune daily activities. Consequently, popular dates reward early booking while quieter periods allow more flexibility.
Firstly, book the hard-to-change pieces once your dates feel firm. Secondly, research opening days, weekly closures, and seasonal hours for key sights. Moreover, some attractions close on specific weekdays and surprise unprepared visitors. Therefore, checking closures early prevents a painful reshuffle later.
Admittedly, planning too early can also create a rigid, stale plan. Instead, leave restaurant choices and small detours open until nearer departure. Similarly, keep one or two slots deliberately blank for discoveries on the ground. Ultimately, early structure plus late flexibility gives you the strongest combination.
Step 3: Build a Wish List, Then Cut It Honestly
Firstly, learning how to create a travel itinerary starts with a generous wish list. Indeed, you should dump every idea into one list without judging it yet. Additionally, ask each travel companion to add their own must-see items separately. Consequently, nobody discovers a hidden priority halfway through the trip.
Subsequently, sort every idea into must-see, nice-to-have, and only-if-nearby groups. Moreover, be honest about energy, interests, and the actual length of your stay. For example, a museum lover and a beach lover will rank lists very differently. Therefore, discuss trade-offs now rather than arguing outside a closed museum.
Furthermore, cut the list until your must-see group feels almost too short. In fact, a short core list creates room for rest and surprise discoveries. However, cutting does not mean deleting ideas forever from your travel life. Instead, save the leftovers for a future trip or a rainy afternoon.
Step 4: Group Sights by Area, Not by Fame
Firstly, learning how to group attractions by neighbourhood saves hours of needless travel. Indeed, famous sights often sit in completely different corners of a large city. Moreover, crossing a city repeatedly wastes energy and fragments your whole day. Therefore, plot every wish-list item on a map before you assign any days.
Subsequently, draw loose clusters around sights that sit within easy walking distance. For instance, this Paris neighbourhood guide shows how one district fills a full day. Similarly, this Porto walking guide groups sights into compact, strollable areas. Consequently, your clusters will reveal natural days almost by themselves.
Additionally, give each cluster a simple name based on its area. For example, you might label clusters old town, riverfront, market district, or museum quarter. Indeed, named clusters make later conversations and daily choices much simpler. Ultimately, each cluster becomes one day, or at most one half-day.
Step 5: Use the Two-Anchor Rule for Pacing
So, how many activities per day on vacation can you enjoy without exhaustion? Generally, two substantial anchors suit most travellers on most normal days. Moreover, one anchor might be a major museum, a guided walk, or a viewpoint hike. Therefore, treat two anchors as your default rather than your minimum target.
Firstly, choose one morning anchor and one afternoon or evening anchor. Secondly, add only small, optional extras around those two fixed points. For example, a café stop, a market browse, or a short park rest fits easily. Consequently, a delayed anchor never collapses the rest of your day.
Meanwhile, protect the gaps between anchors as fiercely as the anchors themselves. In fact, lunch, travel, rest, and wandering all consume real time and energy. However, many planners count only ticketed activities and ignore everything between them. Ultimately, honest gaps turn an exhausting checklist into a pleasant rhythm.
Step 6: Do the Travel-Time Maths Before You Commit
Firstly, estimate travel time for each leg using your own route and transport choice. Specifically, check the actual route on a map for your travel date and hour. Additionally, add waiting time, walking time, and a small margin for confusion. Consequently, your estimate reflects real movement rather than optimistic straight lines.
Subsequently, use this simple method for every single day in your plan. For instance, add anchor time, travel time, meals, and rest into one total. Moreover, compare that total honestly with the hours you actually have awake. Therefore, cut or move something whenever the total exceeds your comfortable day.
For example, imagine two anchors that each need about two hours. Additionally, imagine ninety minutes of total travel and two hours for meals. Indeed, that day already holds about seven and a half hours of commitments. Therefore, you should add only light extras, not another major attraction.
Step 7: Turn Your Plan Into a Simple Template
Firstly, a clear travel itinerary template turns scattered notes into one trusted document. Indeed, learning how to organize a travel itinerary means giving every detail a home. Moreover, a consistent layout helps companions read the plan without asking questions. Therefore, copy the simple template below and adapt it for each day.
| Time Block | Plan | Notes |
|---|---|---|
| Morning anchor | Main sight or activity | Tickets and opening time |
| Midday pause | Lunch and rest | Backup café nearby |
| Afternoon anchor | Second sight or activity | Travel route back |
| Evening flex | Optional stroll or show | Drop if tired |
| Rainy-day swap | Indoor backup option | Keep tickets flexible |
Additionally, store bookings, addresses, and confirmation details directly inside that same template. For instance, a travel itinerary planner app can hold the template alongside maps and tickets. However, a simple shared document works equally well for many travellers. Ultimately, choose the format your whole group will actually check each morning.
Step 8: Add Buffer Days and Rainy-Day Backups
Firstly, experienced planners treat buffer days in itinerary design as essential, not lazy. Indeed, delays, closures, illness, and simple tiredness affect almost every longer trip. Moreover, a buffer day absorbs those shocks without destroying your must-see list. Therefore, schedule one buffer for roughly every four or five busy days.
Subsequently, fill buffer days only with postponed anchors or gentle local exploring. For example, you might revisit a favourite neighbourhood or enjoy a long, slow lunch. Similarly, rainy-day backups should sit ready for each outdoor-heavy day in advance. Consequently, bad weather triggers a swap rather than a stressful scramble.
Additionally, pack each day with one indoor option that needs no advance booking. In fact, a covered market or a free gallery can rescue a wet afternoon. However, check opening hours for backups just as carefully as for anchors. Ultimately, a prepared backup feels like a plan, not a consolation prize.
Step 9: Plan a Multi-City Route Without Rushing
Firstly, learning how to plan a multi city trip means respecting distance and changeover time. Indeed, every hotel change consumes packing, travel, check-in, and settling-in energy. Moreover, a new city also demands fresh orientation on your first afternoon there. Therefore, give each base at least two nights whenever your route allows it.
For instance, places to visit near Zurich by train become easier from one steady base. Similarly, this Italy itinerary guide helps you order cities into a logical line. Consequently, you will spend your evenings exploring instead of repacking suitcases nightly.
Additionally, order your cities to minimise backtracking along your overall route. Specifically, travel in one direction and depart from your final city when possible. However, transport timetables and prices sometimes favour a slightly different order. Ultimately, compare total travel time, not just the number of stops.
Tools That Help Without Taking Over
Firstly, a travel itinerary planner app suits travellers who juggle many bookings. Indeed, some apps gather reservations, maps, and notes into one searchable place. Moreover, offline access matters when signal disappears in stations or rural areas. Therefore, test your chosen app before departure rather than at the airport.
However, paper still works beautifully for simple trips and small groups. For example, one printed day by day travel plan on the fridge aligns a whole family. Similarly, a shared note on a phone often beats a complex specialist tool. Ultimately, the best system is the one everybody opens without prompting.
Additionally, keep one master copy and mark who owns each update. In fact, duplicate versions cause missed trains and double-booked activities surprisingly often. Consequently, agree one source of truth before the trip begins in earnest. Finally, revisit how to plan a trip itinerary basics whenever a new booking arrives.
Your Trip Planning Checklist Before You Book
Firstly, run this trip planning checklist before you pay for anything non-refundable. Indeed, the checklist catches mismatched dates, closed sights, and impossible travel days. Moreover, it takes only minutes when your notes already sit in one place. Therefore, treat it as a final gate rather than extra bureaucracy.
- Firstly, confirm arrival and departure times against every booking you hold.
- Secondly, check opening days and last-entry times for every anchor sight.
- Additionally, verify travel time between clusters on your actual travel dates.
- Moreover, save offline copies of tickets, addresses, and emergency contacts.
- Finally, share the full plan with companions and one trusted person at home.
Subsequently, repeat the same check one week before you leave home. In fact, hours, strikes, and weather forecasts can change after you first plan. Consequently, a short second pass protects months of careful preparation easily.
Sample Travel Itinerary: Five Balanced Days in One Base
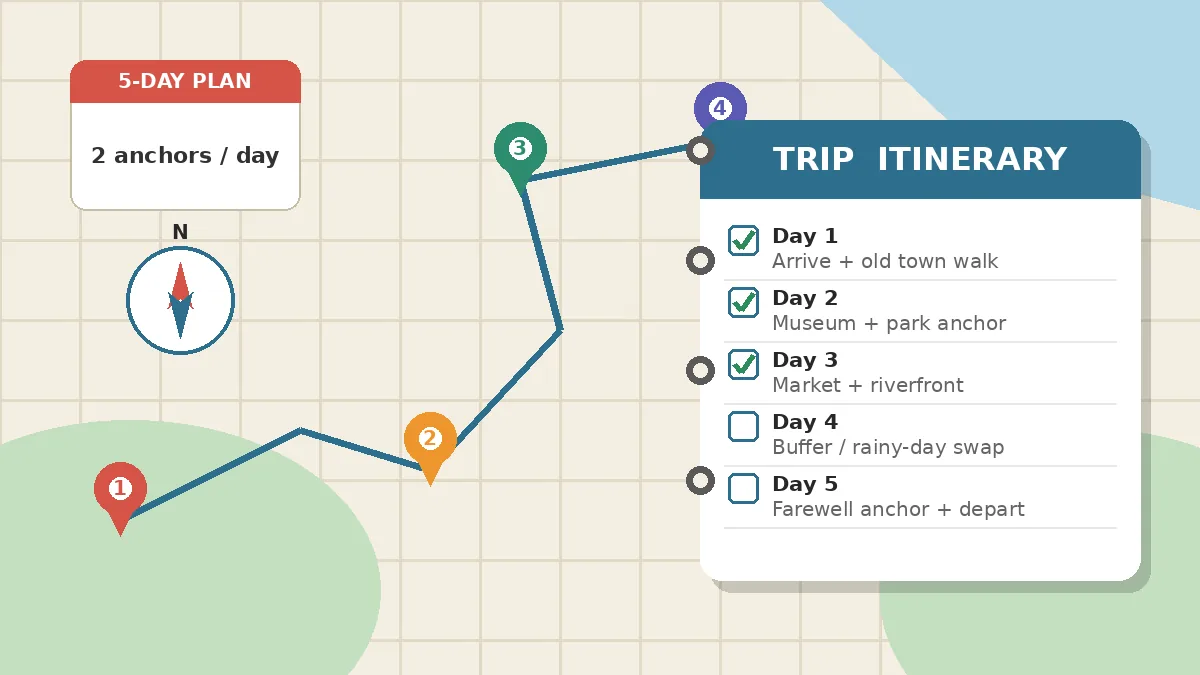
Below, this sample travel itinerary shows the system working in one city base. Indeed, the example uses a generic city so you can copy its rhythm anywhere. Moreover, each day holds two anchors, one pause, and one flexible evening slot. Therefore, adapt the activities rather than copying the exact timings blindly.
Day 1: Arrive Light and Explore Locally
Firstly, keep arrival day deliberately light after any long journey. For example, settle in, buy essentials, and stroll only your immediate neighbourhood. Moreover, an early night protects your energy for the busier days ahead. Consequently, you will start day two refreshed rather than already depleted.
Day 2: Pair a Big Anchor With a Gentle One
Secondly, pair your biggest museum with a gentle outdoor anchor later. Specifically, visit the museum early, rest at midday, and explore a park afterwards. Additionally, keep the evening flexible for a market visit or an early dinner. Therefore, intensity stays balanced across the whole day by design.
Day 3: Spend a Themed Day in One Cluster
Meanwhile, use day three for a focused old-town cluster and local food. For instance, this one-day Luxembourg itinerary shows how compact pacing fills a day well. Similarly, this Jodhpur one-day guide packs major sights into one clear route. Ultimately, a themed day feels coherent rather than randomly assembled.
Day 4: Keep Your Buffer Day Truly Open
Subsequently, keep day four as your buffer and rainy-day swap opportunity. Indeed, move any missed anchor here or repeat a favourite area slowly. However, resist filling this day in advance with brand-new commitments. Consequently, the buffer absorbs surprises exactly as you designed it to.
Day 5: Finish Slowly and Leave Calmly
Finally, spend your final day on leftovers, souvenirs, and one farewell anchor. For example, revisit a beloved café and buy gifts in one relaxed circuit. Moreover, pack early and confirm your departure route before your final dinner. Ultimately, a calm ending lets the trip settle into happy memory.
Travel Planning Mistakes to Avoid
Firstly, most travel planning mistakes to avoid start with simple overcommitment. Indeed, travellers add one more sight until rest disappears from the plan entirely. Moreover, they often copy influencer itineraries built for very different energy levels. Therefore, plan for your own stamina, interests, and travelling companions honestly.
Secondly, many people ignore travel time, closures, and the need for food. In contrast, strong planners check those basics before they chase hidden gems. Additionally, some travellers book every meal and minute months in advance unnecessarily. Consequently, their plan cannot bend when a wonderful surprise appears nearby.
Furthermore, copying a famous itinerary without checking your dates creates avoidable clashes. For instance, weekly closures and local holidays can shut your top anchor unexpectedly. However, a quick calendar check during planning prevents almost all such surprises. Ultimately, your own researched plan will always beat a borrowed fantasy schedule.
Final Check: Does Your Plan Still Feel Like a Holiday?
Firstly, read your finished day by day travel plan aloud to a companion. Indeed, awkward days reveal themselves quickly when you describe them out loud. Moreover, ask whether each day still leaves time for rest and wandering. Therefore, remove one item from any day that sounds breathless when spoken.
Overall, learning how to plan a trip itinerary is really about protecting your attention. Specifically, fewer, better-chosen anchors leave room for people, flavours, and unexpected corners. Consequently, you will remember conversations and light, not just queues and timetables. Ultimately, plan firmly, travel loosely, and let the trip surprise you kindly.